

I sure am getting my craft on over here. I have been wanting my own hospital gown but all of them on Etsy and that I see in online boutiques are close to $60.00. I could not bring myself to buy this knowing it is going to get extremely dirty and be something I definitely only wear once. We are having my friend Jessica in the room with us taking professional photos of my labor and Lilly Belle's birth so I really wanted to be wearing something that I feel more comfortable in and that will be something I feel "beautiful" in looking back at all these pictures for the rest of my life. Next to our wedding...the most important pictures of our life.
I have been researching and pinning and found all of my favorite parts of each gown and combine them all into one fabulous design. I am in no way a seamstress and am very much a beginner when it comes to sewing. I am just counting on my common sense and creativity to make this one work out.
If you have any questions, please feel free to leave a comment down below.
And if you like it, feel free to Pin away!
My total cost for this project was just $26.00. Not too bad.
I'll stop blabbing now and get going on the "how to". Have fun!
DIY HOSPITAL LABOR AND DELIVERY GOWN
Supplies Needed:
- 2 yards cotton fabric
- bias tape (optional)
-7/8" grosgrain ribbon
-____" ribbon

How To:
1. Wash and iron your fabric. (I washed mine in Dreft because I am no obsessed with it)
2. Cut your fabric into two equal pieces. I measured mine so it would be large and comfortable enough to really move around in as I am going to be trying this naturally.
Measured out to be 42"x32".


3. Fold and iron the bottom of one piece of fabric to create a 1/2" hem and then pin to prepare for sewing. (This piece will be the front of your gown)
4. Fold and iron the top of each piece of fabric (which will be the top of your gown) to leave enough room to string the ribbon straps through. I made my hem to be 1.5".


5. Sew your top hems all the way across.
6. Match up both pieces of your fabric so the pattern is facing each other inside out. Measure 12" down from the top of your gown and begin pinning there. You will want to leave a 10-12" space open which will become the holes for your arms. Pin all the way down both sides and then sew.

7. Cut a slit 12" down from the top on your second piece of fabric (the back of your dress). This slit will allow for an epidural or spinal to be put into place if need be.

8. Fold, pin & iron a hem along the entire bottom of your gown. Make sure to do this step after you have already cut your slit down the back. Sew hem.


10. Sew your bias tape to your gown.

11. Cut your strap ribbon into two 42" strips.

12. Fold edges and sew so your ribbon does not fray.

13. Put a safety pin on the end of your ribbon and snake it through the top hem of your gown.

14. After you have snaked your ribbon all the way through, fold in the edges so it looks clean and sew closed. This will also make sure your ribbon never falls out. Be sure to scrunch up the top of your gown to your liking first. I left about 8" of ribbon on each end so I could knot it.

15. Fold, pin & Sew your back slit to create a nice hem.

16. Cut your back closure ribbon into 8" strips. This step could also be replaced by velcro which my husband pointed out to me AFTER I was done spending 20 minutes on this step. (Annoying because he's totally right...much easier). I placed my ribbons all the way down my dress every 2" so that my bum won't show at all.


5. Sew your top hems all the way across.
6. Match up both pieces of your fabric so the pattern is facing each other inside out. Measure 12" down from the top of your gown and begin pinning there. You will want to leave a 10-12" space open which will become the holes for your arms. Pin all the way down both sides and then sew.

7. Cut a slit 12" down from the top on your second piece of fabric (the back of your dress). This slit will allow for an epidural or spinal to be put into place if need be.

8. Fold, pin & iron a hem along the entire bottom of your gown. Make sure to do this step after you have already cut your slit down the back. Sew hem.

9. Pin your bias tape all along the edge of your arm holes.

10. Sew your bias tape to your gown.

11. Cut your strap ribbon into two 42" strips.

12. Fold edges and sew so your ribbon does not fray.

13. Put a safety pin on the end of your ribbon and snake it through the top hem of your gown.

14. After you have snaked your ribbon all the way through, fold in the edges so it looks clean and sew closed. This will also make sure your ribbon never falls out. Be sure to scrunch up the top of your gown to your liking first. I left about 8" of ribbon on each end so I could knot it.

15. Fold, pin & Sew your back slit to create a nice hem.

16. Cut your back closure ribbon into 8" strips. This step could also be replaced by velcro which my husband pointed out to me AFTER I was done spending 20 minutes on this step. (Annoying because he's totally right...much easier). I placed my ribbons all the way down my dress every 2" so that my bum won't show at all.


DONE!


(Ignore my sewing flub shown up close in this photo)
I made sure that the gown ties on my shoulders so that it will be easy for me to nurse Lillian and have skin-to-skin with her right away.

Matt: Why did you do all these ribbons?! It's going to take forever to tie. You realize this isn't a wedding dress right?
Me: Seriously just stop and take the pictures. Ugh.
The reason for the opening in back is just in case I do decide on an epidural. (Which I'm still determined to not have to get). I got this! I want to be myself immediately after she's born. I've been waiting 36 weeks now to feel like myself. I don't even want 3 more hours stuck in a bed not being able to move.
Anyways.....Here's the lovely back lol (our recommendation: use velcro...)
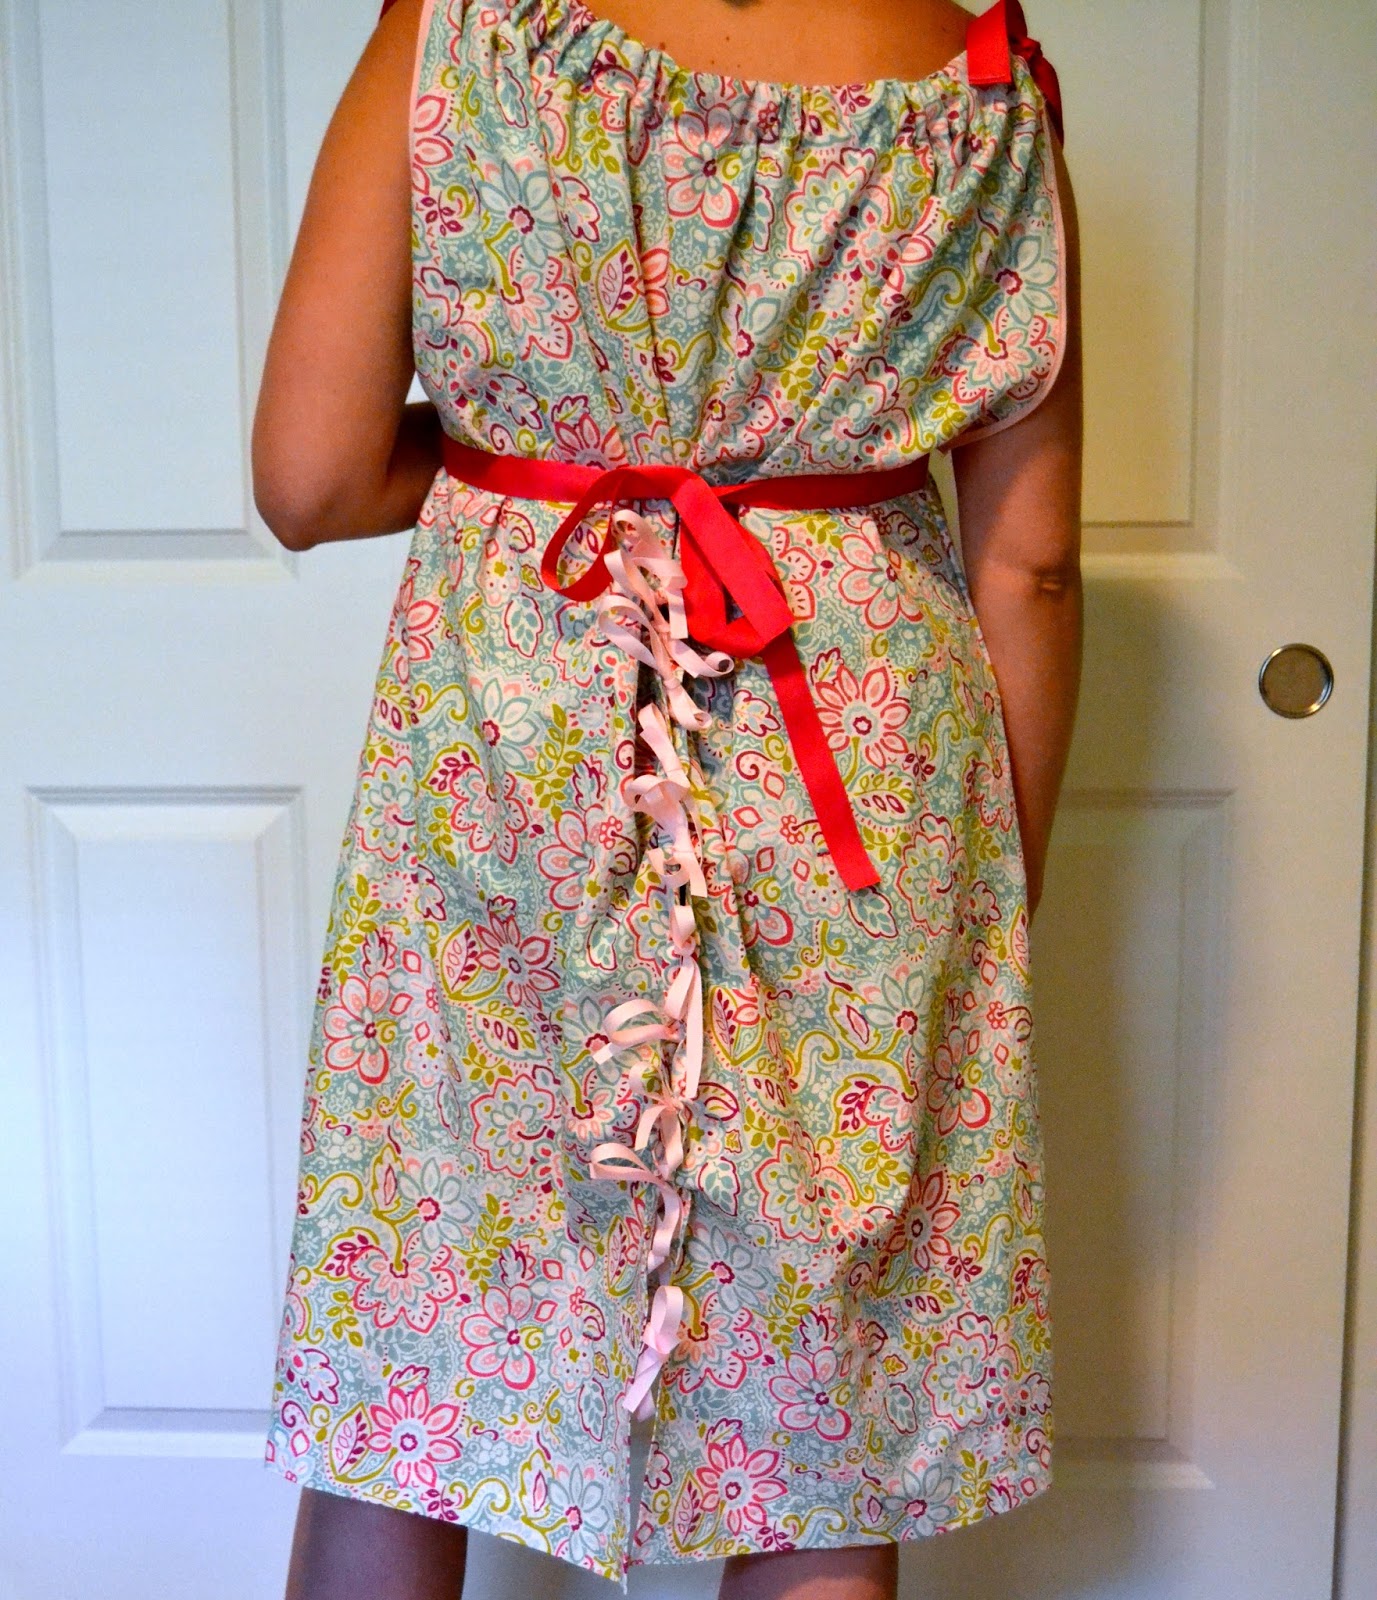
14 ties down the back and all, we are now absolutely 100% ready for the big day. Now we just wait. And wait, and wait... Can you tell I'm getting impatient?
Very cute! You are so crafty!
ReplyDeleteThanks!!!
DeleteI need to get you some Bella Materna girl! When are you coming in!! You could review on your blog! Anne!
ReplyDeleteThat would be wonderful, Anne! I would love to do that and I would love to get some Bella! I will call you very soon :)
DeleteI'm not pregnant yet, but after a year+ of trying and finally allowed to get fertility help, I'm going baby crazy! One thing or another led me to hospital gowns, so I've been on pinterest for a while now looking for good tutorials.
ReplyDeleteYours is by farrrrrrrr the best!! You caught me right away by saying you weren't a professional, that's me too! The rest are all fancy termed and I'd need to Google half the words to understand!
So thank you, for having something easy to understand AND cute :)
I just made this! Thank you so much for the awesome pattern and made it so easy to understand :)
ReplyDeleteIf only I could post a photo. I'm 37 weeks myself and going natural. I bought velcro to do the back but I decided to keep it as a dress so I can use it all year around for breastfeeding and also as I am 100% not wanting any medical intervention so not putting the back slit in keeps me from thinking about getting anything.
Thanks again!
That's so wonderful! I'm so glad you were able to use this and that it was helpful. Congratulations on your sweet baby!!
DeleteLoads!
ReplyDelete